There are a few software for designing digital models using LEGO bricks. Even though their purpose is the same, like all similar software, their features and interfaces are different. Today, we will take a look at some of them and try to decide which is the best LEGO design software.
3D modeling always fascinated me, and I even had a chance to work with software like Autodesk AutoCAD, Autodesk 3ds Max, and Autodesk Maya in and outside of school. For those of you who are not familiar with these, let me tell you they are among the modeling and animation industry’s finest and most complex software. They occupy quite a large amount of space on the harddisk, and won’t run smoothly unless your graphics card and RAM fulfill their minimum requirements.
Luckily, none of the programs we will look at today are quite as complex. As with all software, they have minimum requirements to run, but most computers, old and new, are capable of running them without any problems.
LDD – LEGO Digital Designer
Let’s start with the big fish, shall we? The one and only official LEGO design software, LEGO Digital Designer (LDD)!
LDD gives you three different options before you start: LEGO Digital Designer, LEGO Mindstorms and LEGO Digital Designer Extended. The first one only lets you use the physically available colors. The second one has limited parts, so I’m guessing it only uses the LEGO Mindstorms parts. And in the third, the sky is the limit. You can use any color with any part you like.
Being the official LEGO design software, LDD’s parts library is probably one of the most extensive ones. Even though the LEGO Group has announced they will not update the software anymore, some parts have been added to the library since. However, this extensive library is also one of LDD’s disadvantages, since it slows down the software. Once all the parts are loaded, its speed improves, but only until you open a new document. Then you have to go through the same process all over again.
LDD Interface with parts being loaded
The user interface is simple and easy to get used to. All of the commands available in the software are shown on-screen and in the pull-down menus – with one important exception: Pan view. Fortunately, there is a very informative help file which tells you how to do what if you ever get stuck.
The biggest disadvantage of the software is that the parts need to “click” as you build. For example, if you’re designing an interior space, and have a table with tile finishes, you can’t put anything on top of it, because there are no studs to click onto. While it may not seem that big, it creates certain limits.
All in all, LDD is a great software for beginners – and for those with patience.
LDraw
According to the LDraw website, the LEGO design software called LDraw is no longer featured. Apparently it was a DOS based program, and didn’t have a graphical user interface, which made it hard to use. However, it offers a vast library, over 7,400 LEGO parts, and can be integrated into other software.
The last parts update was in December 2018. It may feel 6 months is a long time, but considering LEGO does not release new parts (new moulds, that is) every other week, I think it’s pretty updated as it is. However, they mention on their site that modeling new parts is a hard process, and since they work with volunteers, it may take a while for a certain part to be released.
LeoCAD – LDCad – Bricksmith
Depending on your computer, you may choose to use the LDraw Parts Library with any of these programs. LDCad is Windows based, Bricksmith is Mac based, and LeoCAD can be used on both. LDCad and LeoCAD can also be used with Linux operating systems.
Considering they are 3D software, all of them run smoothly, even on an old computer like mine. Having used 3D software before, as well as a few virtual designers, I think this is really important. If you have a computer with the latest technology, you may not notice it, but if you have been using the same computer for the last few years, it makes a huge difference.
Even if you’re familiar with another LEGO design software, you need a little time to adjust to a new one. While some commands are similar and exist in all programs, such as zoom, pan and rotate the workspace, their shortcuts may differ from one to the other, as may the overall interface.
The User Interface and Overall Accessibility
The on-screen graphics look like the images from the instruction booklets. This makes all three programs run faster and more smoothly. As for the user interface, I found LeoCAD to be the best of all three. The interface of Bricksmith and LDCad takes a little time to adjust to.
LeoCAD Interface
These three have many things in common, starting with their part library. Each of them lets you choose the color you want to use with whichever part you’re using, regardless of the fact it exists in physical form or not. In my opinion, this is both good and bad. It’s good, because it unlimits your model even further. It’s bad, because if you want to turn your digital model into a physical one, you may realize some of the parts don’t exist in that particular color.
Bricksmith Interface
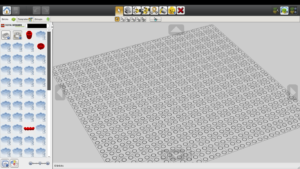
In Bricksmith, the parts library isn’t displayed as well as in LeoCAD and LDCad. You see the image of the part only after you click on its name, which makes it impossible to browse as quickly as the other software. LDCad, on the other hand, is probably the best of all three in this matter. The bricks are categorized, and once you click on a category, all the bricks under that category are displayed with images. Of course if you’re searching for a specific part, you can just write the name in the search bar and it will appear.
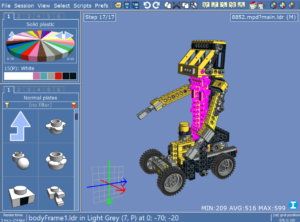
LDCad Interface with a sample model
All three programs let you view the steps one by one. LeoCAD also allows you to export each step as a separate image, as well as rendering the whole model.
If you want to create digital models, either small or big, all three provide a huge library and the chance to use most of the official LEGO colors – whether the physical form of that color exists in a specific part or not. If I had to pick one, though, I’d pick LeoCAD. The interface is easier to get used to, and so is browsing through the library.
Get the Latest LEGO Sales & Deals
Studio
Of all the LEGO design software I looked at today, Studio is the most extensive one in terms of features. The parts library would probably be head-to-head with LDD, though Studio is updated regularly.
Having a direct connection to Bricklink is a huge plus. It allows you upload to your Bricklink wanted list as well as showing you the price of a certain part within the program. The colors you can use in your builds are those that only exist in physical form, which, like I said before, can be both an advantage and a disadvantage.
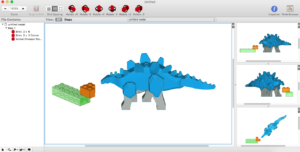
Studio Interface
If you’re familiar with the Bricklink categories, you won’t have any trouble finding what you’re looking for, since Studio has the same categories for parts. Additionally, there is a “Shapes” option for browsing, with a different categorization. And like all the other above mentioned software, it has a search option.
There are three interesting features that I’d like to mention, which separates Studio from the others.
Build Together: This lets you work on the same project with others by either hosting or joining an already existing host.
Model Info: This provides a list of parts used on your model, along with quantity, unit price, and total price. It also provides physical information, like the dimensions of the model in studs, centimeters and inches, as well as its weight.
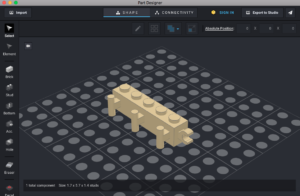
Part Designer: This is a separate software designed to create new parts or modify existing parts. You can create non-existing bricks and design your own minifigures from scratch. Then you can export what you created directly into Studio and use it in your model.
Part Designer Interface with a non-existing part
Now for the previous LEGO design software, I talked about how fast they run. Studio is somewhere in the middle. It’s not as fast as the programs that use the LDraw library, but it doesn’t have a long waiting time for the parts to load like LDD, either. Considering the features it has, I think it’s acceptable.
Another thing that surprised me in Studio was the rendering. I have to admit, I was expecting a simple image when I clicked render. What I got was a photo-realistic image.
Mecabricks
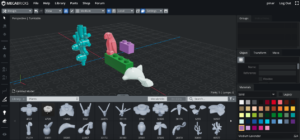
If you follow our blog regularly, you know that I’ve already talked about Mecabricks in some of my previous articles, and used it to create some custom characters. I won’t deny that I favor it, but I’ll try to be as objective as possible when comparing it with the other software.
There are two main reasons why Mecabricks is my all time favorite. One, it’s mobile. While the other programs are great, you need a computer to install them, along with certain hardware requirements, no matter how small. Mecabricks, on the other hand, can run anywhere that has a web browser, even on your phone. Ok, it is a bit harder to use on a mobile phone, but I have used it on my tablet and it runs as smoothly as it would on a computer.
“… it’s the only way to design LEGO while you pretend to listen to that PowerPoint presentation.”
If this doesn’t move it up the list, I don’t know what would 🙂
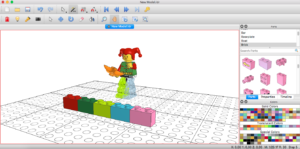
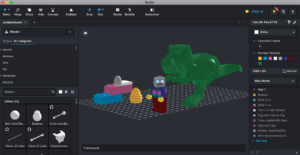
Mecabricks Interface
The second reason is its rendering capabilities. As an amateur photographer with not enough space to build my own LEGO city, the idea of doing it virtually and the ability to render it so it looks like a real photograph is more than appealing to me. If you have a history in rendering, you’ll find that Mecabricks offers pretty much everything the big-name programs offer. If not, don’t worry, because there are various presets which let you render in different light conditions.
The parts library in Mecabricks is really big, and includes some of the newest moulds LEGO has released. You can find many printed parts for minifigures, too, and scatter them around your builds. As for the user interface, it’s easy to get used to after a few tries.
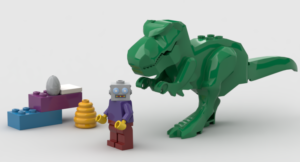
My rendering skills are a bit rusty, so I borrowed an image from the developer’s Flickr page
A Quick Summary
So here are the software mentioned in comparison with each other.
|
Name |
Operating System |
Speed |
Ease of Use |
Supported |
Render |
Steps / Instructions |
Free to use |
|
LDD |
Windows / |
OK |
Very good |
LXF, LXFML, LDR |
OK |
✓ |
✓ |
|
LeoCAD |
Windows / |
Very good |
Very good |
LCD, LDR, LXF, |
OK |
✓ |
✓ |
|
LDCad |
Windows / |
Very good |
OK |
LDR, DAT, MPD |
N/A |
✓ |
✓ |
|
Bricksmith |
Mac |
Very good |
OK |
LDR, DAT, MPD |
N/A |
✓ |
✓ |
|
Studio |
Windows / |
Good |
Good |
IO, MO, LDR, |
Good |
✓ |
✓ |
|
Mecabricks |
Any |
Very good |
Good |
LXF, LXFML, IO, |
Very good |
✓ |
✓ |
Which is the best LEGO design software?
There isn’t one. Okay, that sounded better in my head. What I’m trying to say is, there isn’t only one. Depending on what you want to do, the answer to that question changes.
If you want to go wild and design without caring whether you want to build it in real life or not, I’d go with LeoCAD.
If you only want to design with existing bricks, and order them easily as soon as your model is finished, Studio is the right fit for you.
If you want to create life-like renders, or be able to design wherever you are, Mecabricks is the best option.
After spending two days exploring these programs, I can’t help but think what it would be like to have all these brilliant minds come together and create a program which offers everything they offer individually. I know, I know, it’s wishful thinking, but hey, anything is possible when it comes to LEGO, right?
So, tell me, is there one you favor among these? Or do you use a completely different program? Let me know in the comments!
Disclaimer: I haven’t built any models with any of the software mentioned here. I just installed them, took a quick look around, and shared my opinions. My apologies to the developers of each software in advance if any of the information I gave here is wrong or misleading. I also would like to add that not all the features of each program are mentioned here.
Get the Latest LEGO Sales & Deals




Thanks, nice review
But I miss an important feature: animation.
For example LDD has an option called ‘hinge tool’. It allows to rotate objects eg links, axes, gears. But it also rotates connecting parts, like connected hinges. Now this does not behave nicely with gears in LDD so you can’t test your gear box for instance. Can other packages do this?
And there might be other ‘animation’ things, like parts bending (rubber hoses, springs), etc
Thanks, I’m going to give it a try to Mecabricks. And just for you to know, Studio lets you use any color that you want, and lets you know if it exists or not in real life. I’ve been using it for 2 months and I’m really happy with it, but I felt that it has some missing features.
Which features did you feel were missing from Studio?
One feature that you did not delve deeply into was how easy Mecabricks can export to Blender. While they have a free version, why not support them with the advanced features the pay export/import version it has. Blender has the power behind it to push your LEGO images and especially animations to the next level. Mecabricks exports are perfect and you can choose to display all the finger prints and scratches just like the movie. The just work so well together.
I want to say that what you said about leocad etc. having free color options applies to Mecabricks.
In your list summary it seems that Mecabricks is free to use. It appears to me though that you need to buy credits to be able to render images (only screenshots are free)… or did I miss something?
Also on LDD I am able to make screenshots but I don’t find any proper render option.
Can somebody help me with this?
Thanks
So long as the model built in Mecabricks is under 1000 pieces then renders are absolutely free. You would need to spend credits for any renders above 1000 pieces though