Creating custom models (or MOCs) is quite enjoyable, but like everything, it has its disadvantages. I was set on building a custom LEGO Blade Runner Spinner, and before I started, I asked myself a few questions, which, I think, should be asked by everyone before starting such a model.
- How much are you willing to spend?
- Is there enough information out there to build it?
- Have you got enough bricks to cover the build (usually not) and where can you get them from?
- Is it worth the effort?
Usually you will know most of the answers here before you start. I myself have been down this road only to get discouraged.
Besides, I always wanted to do something like this and the subject matter came up a few weeks ago so I thought why not?
Where to begin?
First, check out all the information you can on the subject that you want to build. Me, I wanted to create my own LEGO Blade Runner Spinner from the original movie. I loved the first model. Even though it was not a big model as some customs can be, it was just the right size. I also gave up on LEGO Ideas putting this through, as like many other good ideas I’ve seen. Sometimes for whatever reason, they just don’t make them and this was one of those sets.
It was quite doable for me. First things first, I did some research online and after a few searches and many cups of coffee, I got the information I needed.
First the video on how to build it
The instructions to build this are offered free and designed by a guy called hachiroky24, so please give him credit were credit is due, not me. I was just following his instructions.
Then the parts list
I found this information very well thought out and it was decent of him to do this, as these days it is very rare indeed to have someone to offer information like this without asking for payment and it shows what the LEGO builders community is made of.
Now, I opted for the original Blade Runner movie version, though there is an updated version of the new movie out there. Having said that, when you look at the parts required, two things you take away from this: 1. What was I thinking and 2. Can I actually do this?
But for now, it’s searching time, I printed out a coloured photograph of the parts required, and the first thing I noticed was I hadn’t seen parts like these in a while. Some I recognised, others were going to take some time to obtain. Luckily there are sites out there that can help, if you’re reading this then you’re on one: Firestar Toys. Others include Bricklink, Toy Pro and as a last resort, eBay.
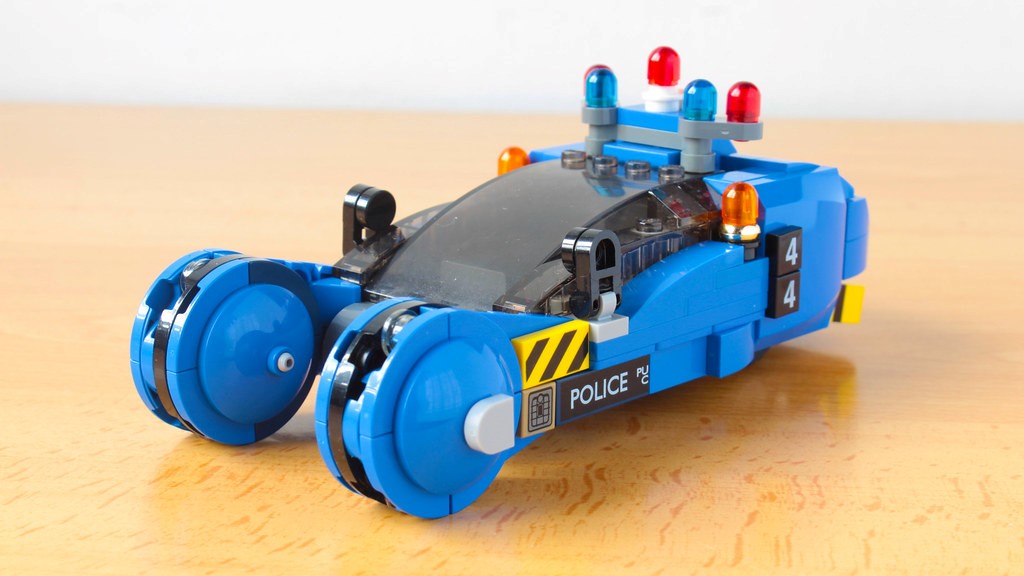
I also did some rummaging through old LEGO parts, as sometimes, not all the time, you get lucky (I didn’t!). I got some of the basic parts, though, and the more I looked into this, the more the list seemed endless. Then I picked up the latest LEGO catalogue and had a look to see what sets used these parts. Sure enough it didn’t take long to find some, a good set to start with was 75891, Speed Champions, Chevrolet. It had some of the parts so I was on a roll. I was ready to make a LEGO Blade Runner Spinner model.
Next, I worked out a budget. Most models of this size can set you back about $100-150 AUD depending on how unique the parts are. This was no exception.
Identifying The Parts
So I started working out the part numbers (which was no mean feat!). You do this by going through the LEGO instructions usually at the back of the book (go to the main LEGO website if you haven’t got the catalogue you need).
The code for each part is a seven digit number. For example, a curved blue tile has the code 6194724. I needed 16 of these!
Then once your list is complete, you go shopping.
Be prepared when you start this that not every store will have what you want. If you are lucky, a LEGO Store is your first port of call. What you can’t get there, you get online, such was the case with me.
Before you build this, try to see if you can get around using some of the unique parts. You usually do this by doing a virtual build. I did this before I started using a free program called LEGO Digital Designer. You can download it here.
Once you have most of what you need to get started, you begin. It was not a difficult build, I did this in stages. The main let me down, I was the waiting on the parts to arrive. Some I cheated with and came up with my own solutions, but I stayed true to its original look and the model started taking shape.
Colour was also a big problem. Honestly, I’d never seen half of these bricks in that blue colour and I was substituting colours just to finish it.
Adding The Minifigure
The important thing is not to rush it. It’s been 6 weeks since I started and I need to wait another 2-3 weeks. Such is getting parts from overseas, so while waiting for the final parts to arrive. Meanwhile, I was looking into making a LEGO Blade Runner Decker minifigure to make the model complete.
As you can see most of the parts here have been around for a while now. If you use your imagination I’m pretty sure you’ll get the combination right eventually.

Get the Latest LEGO Sales & Deals
Now why Blade Runner you ask?
Well, when I first saw this movie, I loved the fact that the vehicles in this could possibly work. Okay, so we are not there yet, but there is something very loosely based on this in the pipeline, perhaps to be released in the next year or two. It’s being made by an Israeli company designed on a World War 2 flying device called the flying mule or jeep. So it’s not a drone or has wings unlike other flying cars but it works.
So in Blade Runner, this movie prop was the closest thing to it and I wanted the model, plus I really enjoyed the movie.
Back to the model…
Well, I got most of the parts last Friday, and it’s really beginning to take shape. It’s taken longer than I expected, but given what the end result will look like, it will be worth it.
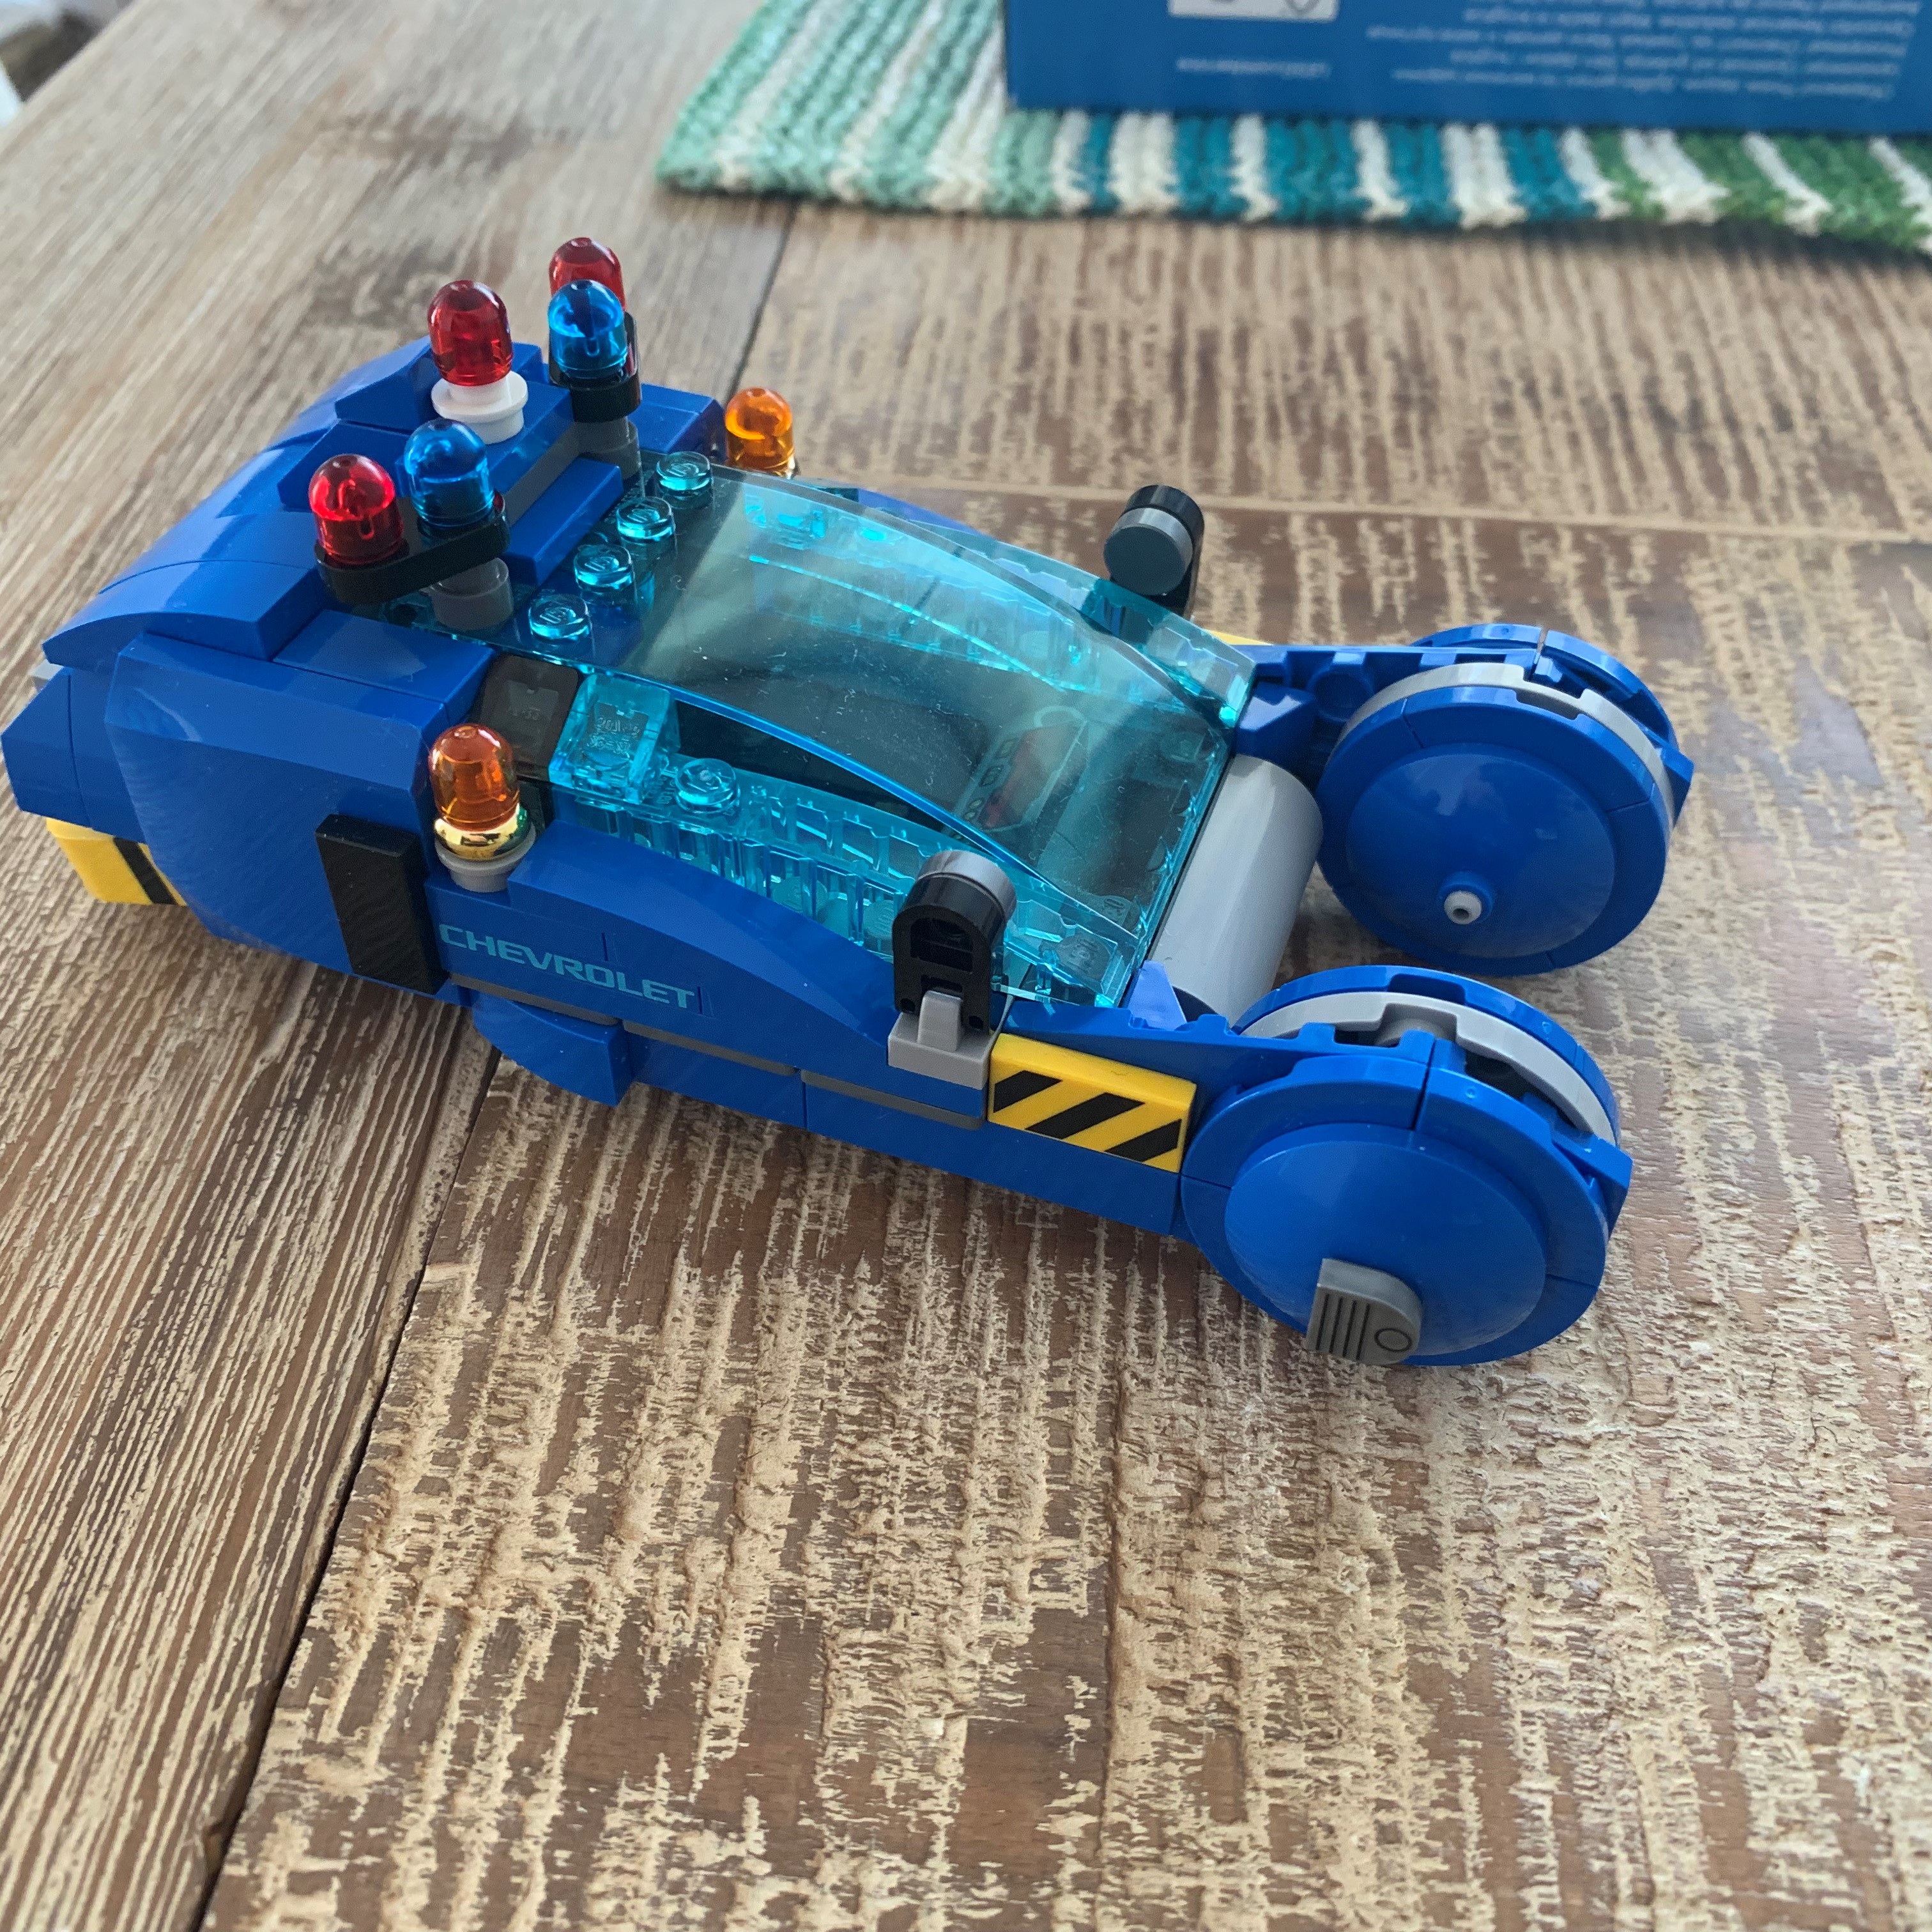
The build so far
Now, I placed the last order for the tile decals and the minifigure today. So in two weeks time, it should be finished. Even though there are colour differences, canopy being the main one, I think I can be forgiven. I have also added my own spin on things due to part restraints.
I have to say, this was a very satisfying build and although it didn’t always go as planned, some time in the future I’d like to expand this to a two seater version as this is a single seater.
It means collecting more blue parts to which I’m not overjoyed about.

Conclusion
Total cost was around $130 AUD. A bit expensive, I know, but it would have probably gone higher except for the fact I had help sourcing the parts. As for future projects, I’d like to have a go at building the colonial Viper MK 2 from Battle Star Galactica but for now I’m the proud owner of my own LEGO Blade Runner Spinner thanks to hachiroky24. Once again, I’d like to thank this guy for putting the instructions and his video online.
Get the Latest LEGO Sales & Deals